Dot & Dab
Everything you need to know about Dot & Dab
Dot and dab, also known as dry-lining is a method used to fix plasterboard to a concrete or brick wall. It involves the act of “dotting” a dry wall adhesive along either the plasterboard or the wall in order to attach it securely.
What is dot and dab?
The method can be applied to plasterboard, insulated plasterboard and other rigid insulation boards. Here we cover how to dot and dab a wall with either plasterboard or insulation plasterboard and around a window.
How to dot and dab a wall:
The surface of the wall you’ve chosen to plasterboard will have an effect on the process of dotting and dabbing. Plasterboard can be attached to brick, concrete or block walls. Though, no matter what the surface is, you need to make sure it is completely dry before beginning the process. If it’s damp or wet, there could be a source of leakage that needs fixing before you can start the dot and dab method for fixing the plasterboard. Its beneficial to mark out the spots on the wall where the plasterboard will be attached, so that you have clear measurements in place. This means you will know what size to cut the plasterboard before you begin dotting and dabbing adhesive.
As above, you will need to cut your plasterboard to the correct size before you begin applying adhesive. This can be achieved using a simple blade as long as it is sharp and cuts cleanly.
Next you will need to mix your adhesive by very carefully following the instructions provided on the packet. It is very important that you mix the plaster correctly, otherwise it will not work. Ensure you have clean materials such as a bucket and mixing stick free of any dirt or dust so as not to contaminate the adhesive.
Finally, you can begin the dot and dab process. This is best achieved using a metal paint scraper to help with a smooth application. Apply the plaster to the wall in vertical and horizontal lines across the top, bottom and sides, and then down the center. The dots should be approximately 6 to 8 inches apart, though this isn’t mandatory as long as you have even spaces between each applied dot of plaster. Also try not to make the dots of plaster too thick, roughly 25mm is the maximum. These figures will depend on the size of your plasterboard, so be sure to check instructions.
If skirting board will be placed after the process, ensure there is a solid line of the plaster where this will be fixed. You must have at least one line of continuous adhesive/plaster in order to meet fire safety regulations. Basically, the more times you dot the surface, the stronger the fix will be, though you want to avoid unevenness.You should never fix the plasterboard if part of it is touching the floor.
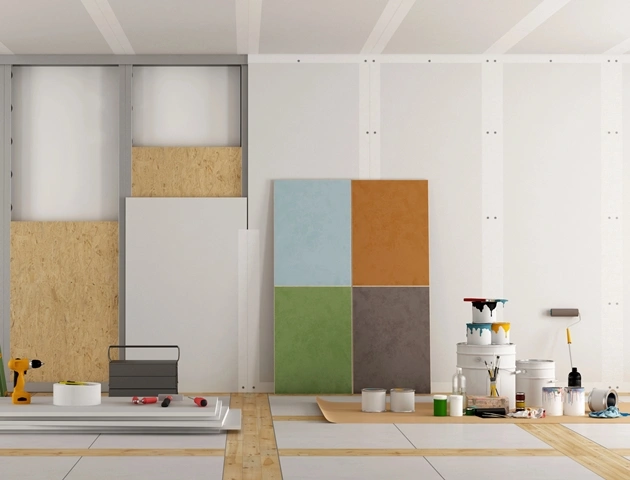
How to dot and dab insulated plasterboard:
If the plasterboard you wish to attach is an insulated plasterboard, then the process is much the same as the above. To place the insulated plasterboard onto the wall, simply lift it and hold it up to the wall, all the while making sure it is level. To attach it, press it onto the surface of the wall that has the pre-applied adhesive and remain in place until it is attached to the wall.
You can use a level tool to tap the surface of the board and make sure it is secured to the plaster dots. If you’re worried about your plasterboard being properly straight and level, a featherhead tool can be used to smooth the surface and make sure the plasterboard is firmly fixed.
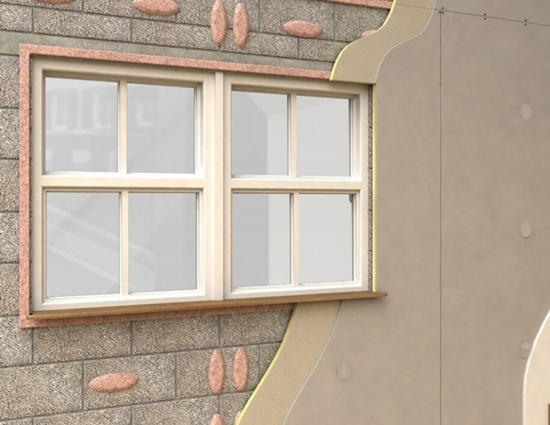
How to dot and dab around a window:
Your wall has a window in it?No problem. Beginning with your reveals and heads first will help make this an easier process. You’ll just need to make sure that the reveal hasadhesive applied evenly on either side. Infill these reveals before fitting the plasterboard.
Ensure that you fit the plasterboard tight to the window frame, which can then overhang the reveals and be cut and trimmed to suit if need be. The edges of the board must be firmly supported by the dots and dabs before skimming.
What thickness of plasterboard for dot and dab?
In order for your dot and dab to be successful, your plasterboard needs to be at least 10mm, but ideally would be more like 12.5 or 15 mm. The ideal plasterboard to use for the dot and dab method is one that is manufactured specifically for this kind of installation.
Generally, this is a plasterboard which is moisture free or resistant to moisture, and that which has a foam backing. As above, always apply your plaster according to the size and nature of the plasterboard, so following manufacturing instructions where your plasterboard is concerned will guarantee you the best results.
Dot and dab adhesive:
The quality of the job done relies heavily on the adhesive you choose to use. While there are many available on the market, the adhesive you want must specify that it is suitable for plasterboard. Usually in the form of a hand-held cylinder with either a gun or a spout design, they will be easy to use and get the job done as long as they are the correct formula.
As mentioned above, make sure you follow the instructions for mixing to a tee, and use minimal water so you don’t ruin the mixture.This is the most important step, because if you don’t have sturdy adhesive, the plasterboard will not be secure.
Why Us:
We are experts in all kinds of projects, especially in the dot and dab method of plasterboard installation. We will ensure that your plasterboard is attached following the correct procedures and will provide a quick and easy service to you.
If you’re after a contractor that you can trust, then we’re the right people for the job, due to plenty of experienced employees who will complete projects in a timely yet professional manner.